 Becoming a parent is a huge learning curve. There are so many products on the market and so many opinions on what you should and shouldn't do. After having 2 children, I've learned a lot about the things you need and the things you can pass on. Lately, I've had a few friends and colleagues ask about my experience with some of the baby things we used so I figured it would be easiest to blog about it all! I should start by saying, we were/are minimalists when it comes to the 'stuff.' I even had a few people comment about how there was 'nothing' on our baby registry- we pretty much stuck to just the cloth diapers we wanted! So here is the stuff we loved, passed on and things we would have changed! (Also, I have no affiliation with any of the products or companies- just one holistic Momma's experience!) Diapering
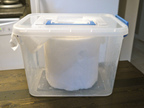 Homemade Bum Wipes Homemade Bum Wipes
 LifeFactory bottles with all the caps and adult water bottle. LifeFactory bottles with all the caps and adult water bottle. Feeding
 Lunchbot stainless steel plate. Lunchbot stainless steel plate.
 Caden 17 days old. Caden 17 days old. Transporting Carriers/Babywearing: I love babywearing! It is by far my favourite way to transport my kidlets! We did get a stroller and my husband calls it our most expensive dust collector...although I still think a stroller is a necessary item. I have used a few different carriers and I find each has their pros and cons.
 Hanging out in the sling at St Jacobs. Hanging out in the sling at St Jacobs.
 Lily 3 years old, 30ish pounds in the back carry. Lily 3 years old, 30ish pounds in the back carry. Structured Carrier: We originally registered for and got a Baby Bjorn. I did not like it. I found it was very hard on my back and I don't think I ever really wore it. My husband used it a handful of times and that was it. I also read a bunch of reviews (after we got it of course) about how it can be very hard on baby's hips which turned me off as well. However, when my second was born I got a bit more pushed to get a structured carrier. I knew trying to wrangle a 3 year old and manage a newborn was not going to be an easy feat, especially with our weekly visits to St Jacob's Farmer's Market. I looked into a few different ones and ended up going with the Ergo. My butterball son was born pretty big, so I wasn't sure whether we needed the infant insert. Thankfully we waited until after he was born to purchase it and I was able to take him and the carrier to my favourite baby store (Snuggle Bugz) to 'pre' test out the infant insert. Sure enough, there was no getting our fatty baby into it. I love this carrier! I have used it with both my kids- my 3 year old as a backpack and my infant in the side and front carry. It isn't the best carrier for small infants as it requires their legs to be spread pretty wide (for hip support) and I found it wasn't until about 5/6 mos that my son really started fitting it well. You can rig it to work before then but it's not really ideal. The infant insert would also help, as long as your infant isn't too big for it.  Our son was born at 8 lbs 10.5 oz and at 6 weeks was 13 lbs 7 oz and 23.5in- size wise too big to fit in the insert but development wise (hip range of motion and neck support) still needed the extra support. Because of this, I would recommend waiting on the insert until baby is born to make sure you can use it/need it. I find it super comfortable to use, even with my daughter who is about 32 lbs. My son loves it and has no problem falling asleep in it and it is amazingly easy to discreetly nurse while wearing it! We do have the original carrier which is only a 3 position carrier- back, side and front (facing you), however, since we got it, Ergo has come out with a 360 carrier which has the 3 positions plus a front carry facing out. I think if they had released the 360, I would have splurged on it but I haven't researched it enough or tried it to say for sure.  We also got the organic bamboo teether covers (the white covers in the photo above) since our son is like a beaver, but I wouldn't have needed them with my daughter. And another really cool thing about the Ergo is that they make kid size doll Ergo carriers! My daughter LOVES being just like Mommy!  Just lounging in the Snuggle Nest! Just lounging in the Snuggle Nest! Sleeping
 Planning his escape- night vision. Planning his escape- night vision. Turns out, it's all wifi these days! We couldn't even get the camera we had. So I got a D-Link wifi baby camera to test out- I wasn't prepared to go wifi and I had a toddler and 6 mos old so I grabbed what I could and brought it home. As I waited for my warranty gift card to arrive so I could return and re-buy my camera, I thought about what I wanted to do- baby monitor cameras are over double the price of regular wifi cameras and essentially do the same job. The baby monitor camera has the added feature of 2-way speakers aka you can talk to baby through the camera and you can play music through the camera. Both the Summer Infant and Motorola sets had these features and we NEVER used them. Talking to your baby when they are trying to sleep is game over. Both the regular and baby wifi cameras have similar display quality, night vision, motion detection/notification, sound, recording function and picture function. But the regular camera is about a third of the price of the baby camera.  Inseparable- day vision. Inseparable- day vision. So we decided to go with a regular D-Link wifi camera- 2 actually, one for my son's room and one for my daughter's, and they are perfect! You operate both using a downloadable app and as an added bonus compared to the camera/handheld display type, you can access the camera from anywhere! I can check my kids from work if I want to right from my iphone! I love these cameras! Even once our kids are too old for monitors we can transition these to their intended security camera purpose. The one downside of wifi vs the traditional set is they aren't as portable. You can't really take it with you on a trip without needing to set up the camera all over again on a new network and you can't pan with these, the cameras are fixed and have to be moved manually. Even with these limitations, for me wifi benefits surpass the down sides. 
So, I think I've hit all the big items, at least I can't seem to think of anything else! I will be doing a continuation post on cloth diapering since it is such a huge topic and likely a toddler/preschool post since my daughter is now 3 and a half and there have been some things we have found that we love for this age group...so stay tuned! Hope you find it all helpful! Disclaimer: Naturopathic Doctors strive to provide individualized health care. The information contained in these topics is not intended nor implied to be a substitute for professional medical advice, it is provided for educational purposes only. This information shouldn’t take the place of seeing an ND for individualized health recommendations.
0 Comments
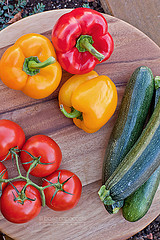 Photo Credit: Lili B. Capaccetti via Compfight cc Photo Credit: Lili B. Capaccetti via Compfight cc If I had to pick what causes some of the most confusion when it comes to discussing nutrition, I think I would have to go with carbohydrates. When people hear the word, most immediately think of bread, and I would even say grains for that matter. Many don't even realize that all vegetables are considered carbohydrates, as well as, all fruits. So let's answer some common questions. What is a carbohydrate?
Are Complex carbs really better?
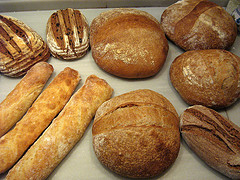 Photo Credit: Ibán via Compfight cc Photo Credit: Ibán via Compfight cc I thought whole grains were better? How can that be if it's absorbed the same?
And what about gluten?
Gluten Sensitivity? Celia? What's the Deal?
It seems everyone is gluten sensitive these days, why?
But I've heart Gluten-Free is often worse than the 'regular' stuff?
So what to do?
Disclaimer: Naturopathic Doctors strive to provide individualized health care. The information contained in these topics is not intended nor implied to be a substitute for professional medical advice, it is provided for educational purposes only. This information shouldn’t take the place of seeing an ND for individualized health recommendations. 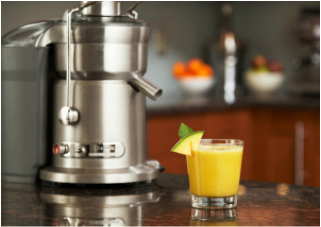 Photo Credit: Food Thinkers via Compfight cc Photo Credit: Food Thinkers via Compfight cc I have been asked this question so many times now: What's better, making a smoothie or juicing? As much as many may think this should be a black and white question, it's actually a bit more complicated. Juicing has become ever more popular in the last couple of years- though die-hards may say it's been popular long before then. With food and health related documentaries becoming more mainstream and their wide availability on Netflix, films like Fat, Sick and Nearly Dead and Food Matters have likely been a driving force behind juicing's ever more popularity. Juicing offers the body nutrients on a silver plater so to speak. It's like a 'nutrient shot' for your body. Fibre which would normally help slow digestion and absorption is removed allowing for nutrients to be quickly absorbed and utilized. This can be very helpful to rapidly increase ones nutrients as multiple fruits and vegetables are used to make just a cup of juice, while trying to eat all those fruits and vegetables would fill you up a lot faster- again, because of the fibre. That leads into some of the downsides of juicing, the first being, fibre is good! We need fibre! For what you might ask? Well here's a little breakdown of fibre's role in the body:
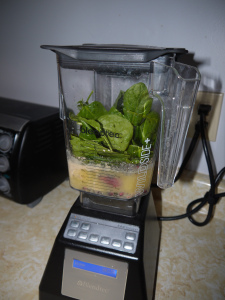
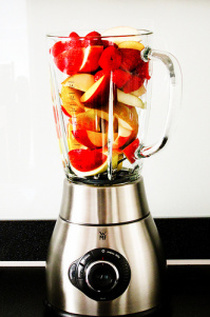 Photo Credit: lkaestner via Compfight cc Photo Credit: lkaestner via Compfight cc The second issue is that because fibre is removed, everything is absorbed much, much faster and not just your vitamins and minerals but also sugar. This can lead to a blood sugar spike. Now, this issue can be easily resolved by reducing the amount of sugar in the juice- ie. reducing the amounts of fruits and starchy or sweet veggies used like carrots. However, I often find when I hear about the ingredients going into a juice it's very heavy in fruits and very light in the veggie department. I recently had someone tell me after a work out class the instructor gave everyone some fresh juice she had made and it was SO good. So I asked what was in it- carrots, apples, ginger, lemon. Of course it tasted great! It was like a little sugar shot! Yes, it had lots of antioxidants. Yes, it had lots of vitamins and minerals. But it also probably had about 50 grams of sugar! However, smoothies can also fall victim to this same issue- too much sugar. How many of you make fruit smoothies in the morning? Do you use frozen fruit (like strawberries), a banana, water, splash of orange juice, vanilla yogurt (maybe it's Greek)? Would it surprise you to know this combo packs about 58 grams of carbohydrates, only 6.3g of which is dietary fibre, and only provides 10.7 grams of protein and 2.4 grams of fat most of which is saturated (from the dairy)? That means that there is over 50 grams of sugar in this smoothie- 2 Snickers chocolate bars worth! I do want to note, I am not promoting chocolate bars for breakfast, the smoothie does provide more nutrition- vitamins, minerals, antioxidants- than a chocolate bar would, the issue is the huge amount of sugar. So, where does this leave us? You may be thinking neither smoothies or juicing is the way to go! But I would say don't drop either! Like most things, it comes down to using either, a juice or a smoothie, in the right way and doing it properly. Smoothies can be a wonderful part of your diet- quick, convenient, tasty and a great way to get a few servings of fruits and vegetables- they just have to be done properly. Here are some tips:
Smoothies are a great option as a meal, because (if done properly) they contain carbs, proteins, fats, and fibre. They will provide all the macronutrients for a balanced meal and lots of fibre. With fat, protein and fibre, smoothies can keep you satisfied until your next meal and temper the carbohydrate absorption to keep blood sugar levels steady. Juices are a great addition to a healthy diet, again, assuming they are done properly with mostly veggies and only a piece or two of fruit for sweetness. Because they don't provide any real fat, protein or fibre, I wouldn't recommend a juice as a meal but a great addition to a meal or as a snack. Juicing is a fantastic way to boost nutrients and increase your veggie intake. You can also keep the pulp left over from juicing and use it in another recipe- that way you still get the fibre and any nutrients left behind! Like everything, it's all about balance. Both smoothies and juicing can be great additions to your diet, they just have to be done properly and used appropriately. Disclaimer: Naturopathic Doctors strive to provide individualized health care. The information contained in these topics is not intended nor implied to be a substitute for professional medical advice, it is provided for educational purposes only. This information shouldn’t take the place of seeing an ND for individualized health recommendations.
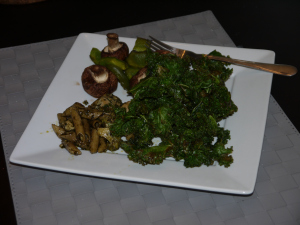
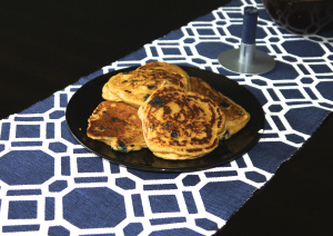 My daughter LOVES baking and cooking with me. This weekend we were gardening and she would pick up a handful of dirt and shout "me roll dough"! So last night before bed I told her we could make blueberry pancakes for breakfast! She has a remarkable memory for a not quite three year old as she will wake up asking for what I told her we could do the night before- "Lily Mommy Boo-berry Pancakes." We are extremely fortunate to live in Waterloo where we are surrounded by local farms and produce- local maple syrup, fresh local eggs, local organic meat, fruits and vegetables- all at our finger tips! This recipe is another example of how to take a basic recipe and change it into a gluten, dairy free option! The original recipe called for wheat flour, buttermilk and butter, all of which have been replaced! Blueberry Pancakes 2 eggs 2 cups oat flour 2 tbsp sugar 2 tsp baking powder 1 tsp baking soda 2 cups coconut milk (or almond or other non-dairy milk) 4 tbsp melted coconut oil 1 container blueberries Beat the eggs until frothy. Add the rest of the ingredients (aside from blueberries) and stir until just blended. Add in the blueberries and mix. Cook in a heated pan over medium-high heat. A note about using dairy free milk, I find I like using coconut milk (from a can) the best. If you let the batter sit for a few minutes before cooking, it tends to thicken up and results in thicker, fluffier pancakes. I find when using almond milk or a thinner milk, the pancakes are very thin and flat, though still very tasty! Disclaimer: Naturopathic Doctors strive to provide individualized health care. The information contained in these topics is not intended nor implied to be a substitute for professional medical advice, it is provided for educational purposes only. This information shouldn’t take the place of seeing an ND for individualized health recommendations. 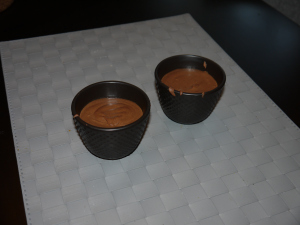 Today is two weeks of clean eating- gluten, dairy and refined sugar free (with the exception of my Mother's Day cheat)! So, I made a recipe that I have been eyeing for a few weeks now from Elana's Pantry- Chocolate Mousse. Oh. My. Word. These little pots of mousse are AMAZING. They are rich, delicious and decadent! Chocolate Mousse by Elana Amsterdam ¼ cup water ¼ cup coconut sugar 1 cup chocolate chunks (I used chips) 4 eggs, separated ½ cup coconut cream from coconut milk In a medium pot, heat water to boiling. Reduce heat, stir in coconut sugar until dissolved. Remove pan from stove and cool coconut sugar mixture for 8 minutes, add chocolate, stirring until melted. In a separate bowl, beat egg yolks until pale yellow. In another medium bowl beat egg whites to stiff peaks. Stir egg yolks into chocolate mixture (in the pot), then stir egg whites into chocolate-yolk mixture until well combined, then stir in coconut cream. Spoon mousse into jars, place in refrigerator overnight to set. Enjoy! As a side note, most of the coconut cream recipes call for you to take a can of coconut milk, put it in the fridge and then open and take the thickened layer of coconut 'cream' from the top. However, the other day at Freshco (great ethnic food section) I found canned coconut cream! This can be used to make whipped coconut cream or anything that calls for coconut cream! So now that the detox is finished, how will our diets change? In general, we don't completely avoid anything but we limit gluten and dairy. We rarely have bread in the house, though during the summer and bbq season you will find hamburger buns. When it comes to dairy, we aren't a milk drinking family (only almond or coconut milk) though we do splurge with goat feta and the occasional ice cream. Again, for us the main reason to do a detox is to 'reset' our diet. So though we don't completely avoid anything, we highly limit! However, having great recipes and resources makes it much easier and so you don't feel like you are deprived in any way! Disclaimer: Naturopathic Doctors strive to provide individualized health care. The information contained in these topics is not intended nor implied to be a substitute for professional medical advice, it is provided for educational purposes only. This information shouldn’t take the place of seeing an ND for individualized health recommendations. Today was a day of left overs since our fridge is overflowing! So, this will be a rather quick post! We simply added a side of baked kale chips and grilled peppers and mushrooms to some of the left over pesto pasta and we had one delicious meal! Disclaimer: Naturopathic Doctors strive to provide individualized health care. The information contained in these topics is not intended nor implied to be a substitute for professional medical advice, it is provided for educational purposes only. This information shouldn’t take the place of seeing an ND for individualized health recommendations.
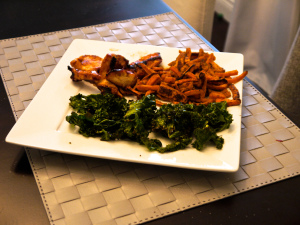
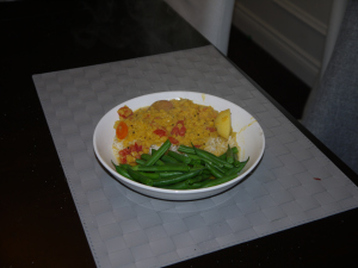 Today for dinner we had Red Lentil Dal, a pretty simple, delicious recipe. This again, is from The Whole Life Nutrition Cookbook by Alissa Segersten and Tom Malterre. This recipe makes a rather large portion so it's great to make if you are looking for a meal that gives ample left overs for lunches and dinners. Red Lentil Dal 2 tbsp coconut oil 1 1/2 tsp black mustard seeds (I couldn't find these so I use brown) 1 1/2 tsp cumin seeds (again, couldn't find these so I use ground) 1 large onion, diced 3 cloves garlic, minced 2 tsp turmeric 2 tsp ground cumin 1/4 tsp cayenne pepper 2 large carrots, peeled and diced 3 medium red potatoes, cubed 2 1/2 cups red lentils, rinsed and drained 6 cups water 1 can coconut milk 1 14-oz can diced tomatoes 2 tsp sea salt or Herbamare In a large pot heat coconut oil over medium heat, then add cumin seeds and mustard seeds. Saute until they begin to pop, quickly add onions and garlic and saute until soft about 5 min. Add turmeric, ground cumin, cayenne, carrots, and potatoes, saute a few minutes more. Add red lentils, water, coconut milk and diced tomatoes. Stir well. Bring to a boil, then let simmer, covered, for about 45 min. Add salt to taste and serve. I actually think this meal tastes even better the next day! If you haven't decided yet, this cookbook, The Whole Life Nutrition Kitchen, is a kitchen staple! Disclaimer: Naturopathic Doctors strive to provide individualized health care. The information contained in these topics is not intended nor implied to be a substitute for professional medical advice, it is provided for educational purposes only. This information shouldn’t take the place of seeing an ND for individualized health recommendations. Today's meal was another featuring veggies and grilled chicken- Marinated chicken, baked kale chips and baked sweet potato fries. This was another homemade marinade my husband threw together, so instead I will touch on the two sides. Sweet Potato Fries Simply chop sweet potatoes into the size you'd like and toss in olive oil. We always add a cajun seasoning mix to them but any seasoning can be added- from salt and pepper to a sweeter cinnamon and honey. Bake for about 20 min in a 400F oven, tossing half way through. Cooking times will vary depending on how large the potato pieces are. Kale Chips These are so good my husband and I actually sometimes fight over them. Wash kale leaves and rip into bite sized pieces discarding the hard stalks. Toss lightly in olive oil- I will actually use my hands to mix the kale with the oil so that it's all lightly coated and you can use less oil. Spread on a baking sheet. It's important to not crowd the kale as this will leave you with 'soggy' chips vs crispy. Sprinkle with any seasoning you'd like, we favour just sea salt but there are many other options, nutritional yeast will give a 'cheesy' flavour. Baking temps will vary and we tend to just use whatever temperature we have the oven set to- between 350 and 400F works best. It's important to keep an eye on the kale as it will cook quickly and can burn, tossing often helps to ensure non soggy kale as well. It will usually take about 10 minutes for the kale to crisp up. These are two of our favourite sides and so quick and easy to toss together! Our toddler polished off everything on her plate at this meal!
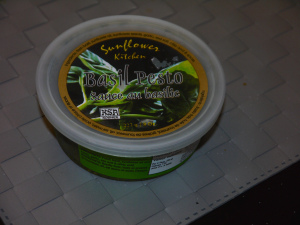
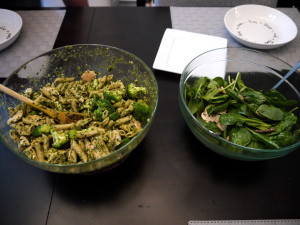
Disclaimer: Naturopathic Doctors strive to provide individualized health care. The information contained in these topics is not intended nor implied to be a substitute for professional medical advice, it is provided for educational purposes only. This information shouldn’t take the place of seeing an ND for individualized health recommendations. Today's lunch/dinner was a very green meal- Pesto Pasta with Chicken and Broccoli and Spinach Salad. We used a pesto made by Sunflower Kitchens. Sunflower Kitchens is one of my favourite brands- they also make an amazing line of different flavours of hummus! Knowing healthy different products and brands can make eating well much easier. This meal was more about 'assembling' than cooking: brown rice pasta, sauteed broccoli and chicken mixed with pesto. The spinach salad was one of my favourite, no fuss salads: spinach, cremini mushrooms, red wine vinegar and olive oil. This is a great meal for the nights where you just don't feel like cooking or are in a hurry!
Disclaimer: Naturopathic Doctors strive to provide individualized health care. The information contained in these topics is not intended nor implied to be a substitute for professional medical advice, it is provided for educational purposes only. This information shouldn’t take the place of seeing an ND for individualized health recommendations. 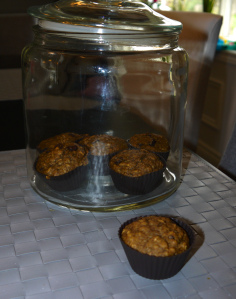 This is a recipe I've posted before but is detox friendly and delicious- chocolate chip muffins. This is another recipe where, after making a few substitutions, is gluten, dairy and refined sugar free. A big take home message about all these recipes is that, just because you are avoiding gluten/dairy/sugar, doesn't mean you have to give up your favourite recipes or foods, by finding and understanding how to make simple substitutions you can adjust your recipes to give you 'healthier' versions! I also like to add ground flaxseeds, hemp hearts and chia seeds to anything I can! Chocolate Chip Muffins 1 cup oat flour (you can use any gluten free flour you'd like, I just find oat an easy sub) 3/4 cup rolled oats (oat bran is what's called for, but I was out) 1/4 cup ground flaxseeds 1/4 cup hemp hearts 1/3 cup sweetener- honey, maple syrup, coconut sugar, unsweetened apple sauce etc. 1 1/2 tsp baking powder 1/2 tsp baking soda 1/2 tsp cinnamon (I usually add more than this) 1 large egg, lightly beaten 1 tsp vanilla extract 2 tbsp coconut oil, melted 1 1/4 cup almond milk 1/2 cup chocolate chips Preheat oven to 400F. Mix dry ingredients together (if using dry sweetener like coconut sugar mix this in here). Mix wet ingredients together (if using wet sweetener like honey or maple syrup mix in here). Add the wet ingredients to the dry, stir just until moistened, then mix in chocolate chips. Fill muffin cups and bake for 16-20 min. Enjoy! And these, like all my recipes, are very toddler approved! Disclaimer: Naturopathic Doctors strive to provide individualized health care. The information contained in these topics is not intended nor implied to be a substitute for professional medical advice, it is provided for educational purposes only. This information shouldn’t take the place of seeing an ND for individualized health recommendations.
|
AuthorWrite something about yourself. No need to be fancy, just an overview. Archives
August 2016
Categories
All
|



 RSS Feed
